

How to manage email and account settings on Windows 10
Although, on Windows 10, signing in with a Microsoft business relationship makes it easier to access additional benefits, such as the ability to sync settings, preferences, and files beyond devices without additional configuration, you however have to configure access manually for apps and services using a dissimilar account.
Notwithstanding, if you utilise multiple services with unlike accounts, the Settings app allows you to add together them ahead of time assuasive apps easier and faster access to your services.
In this Windows 10 guide, we'll walk yous through the steps to add and remove accounts from your device.
- How to add together emails and accounts using Settings
- How to remove emails and accounts using Settings
Important: These instructions are meant to include additional accounts to your Windows 10 contour. If you're looking to add a new user account, you lot demand to use these instructions.
How to add emails and accounts using Settings
To preload accounts for the Mail, Agenda, People, and other apps on Windows x, you have two choices.
Adding a new account for emails
To add an account for emails and apps, apply these steps:
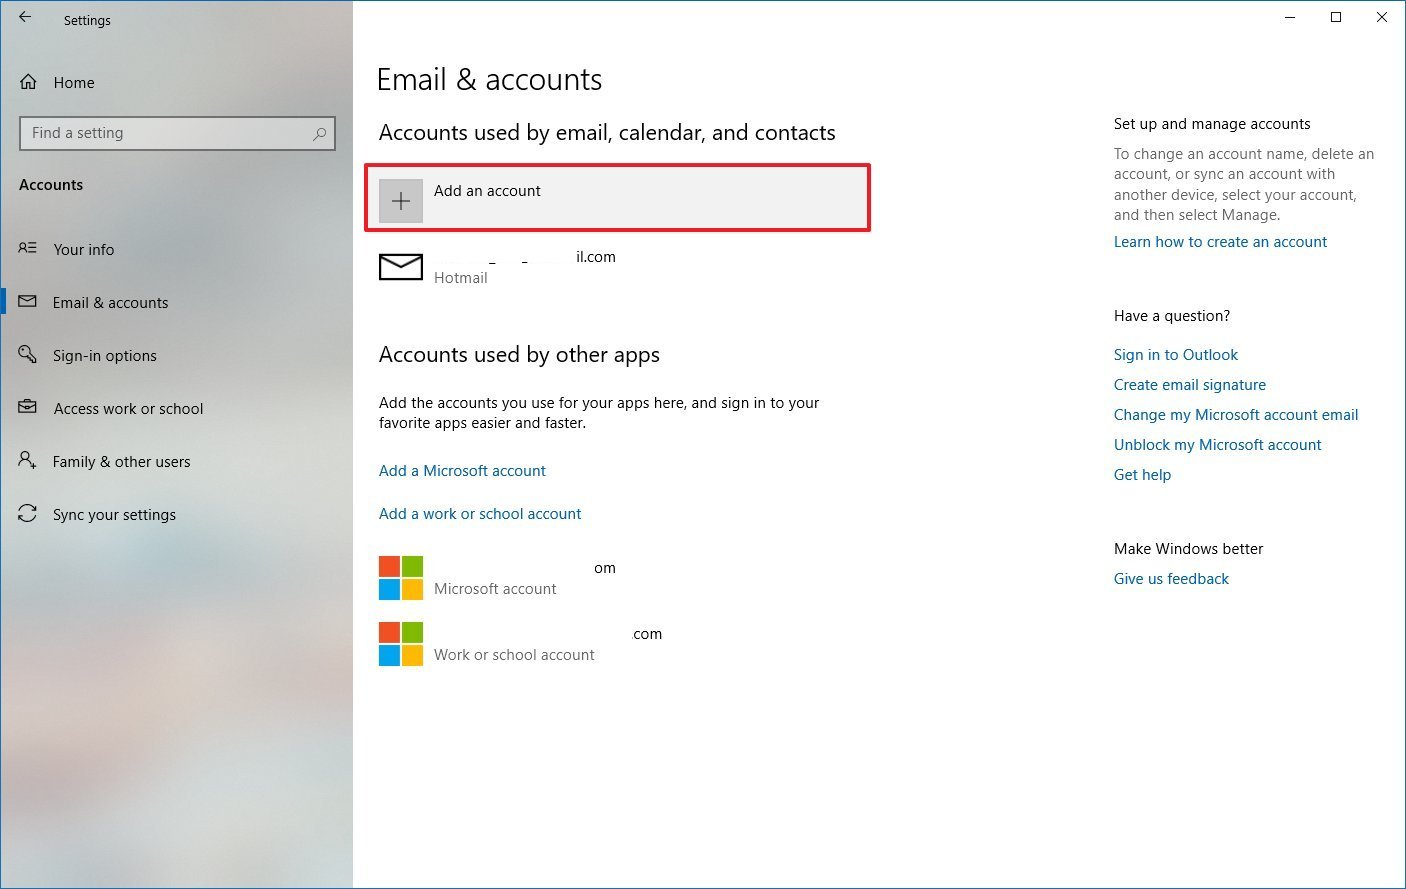
- Open up Settings.
- Click on Accounts.
- Click on E-mail & accounts.
-
Click the Add an account button to include a new email account to permit the Mail, Calendar, and People apps to admission your emails, calendar, and contacts.
-
Select your service provider — for example, Outlook.com.

- Type your email account information.
-
Click the Next push.

- Type your account password.
-
Click the Sign-in button.

- Click the OK push button.
- Click the Done push.


Once you lot complete the steps, the new business relationship will be added to your device to access your e-mail, agenda, and contacts. If you lot're adding a Microsoft account, then the data will also exist available to sign in to other apps. (This choice is similar adding an business relationship straight into the Mail app for Windows x.)
Adding actress Microsoft accounts for apps
If you employ apps with a different Microsoft account, such every bit for OneDrive, Xbox Alive, and others, you can preload those credentials for easier access with these steps:
- Open Settings.
- Click on Accounts.
- Click on Email & accounts.
- Nether the "Accounts used by other apps" section, click the Add together a Microsoft business relationship selection.
- Blazon your Microsoft account data.
-
Click the Side by side button.
- Blazon your business relationship password.
- Click the Sign-in push button.
- Click the OK push.
- Click the Done push.
After completing the steps, the business relationship data will be available for apps to sign in automatically. (You may need to echo the steps to add more accounts.)
Managing accounts for apps
When adding accounts for other apps, Windows 10 will use the information to sign you in to services automatically, but you lot can change the settings to ask for permission before using your credentials.
To manage a different Microsoft account for apps on Windows x, use these steps:
- Open Settings.
- Click on Accounts.
- Click on Email & accounts.
- Select the business relationship that you desire to modify.
-
Use the drib-downwards menu, and select the Apps need to enquire me to utilise this account option.
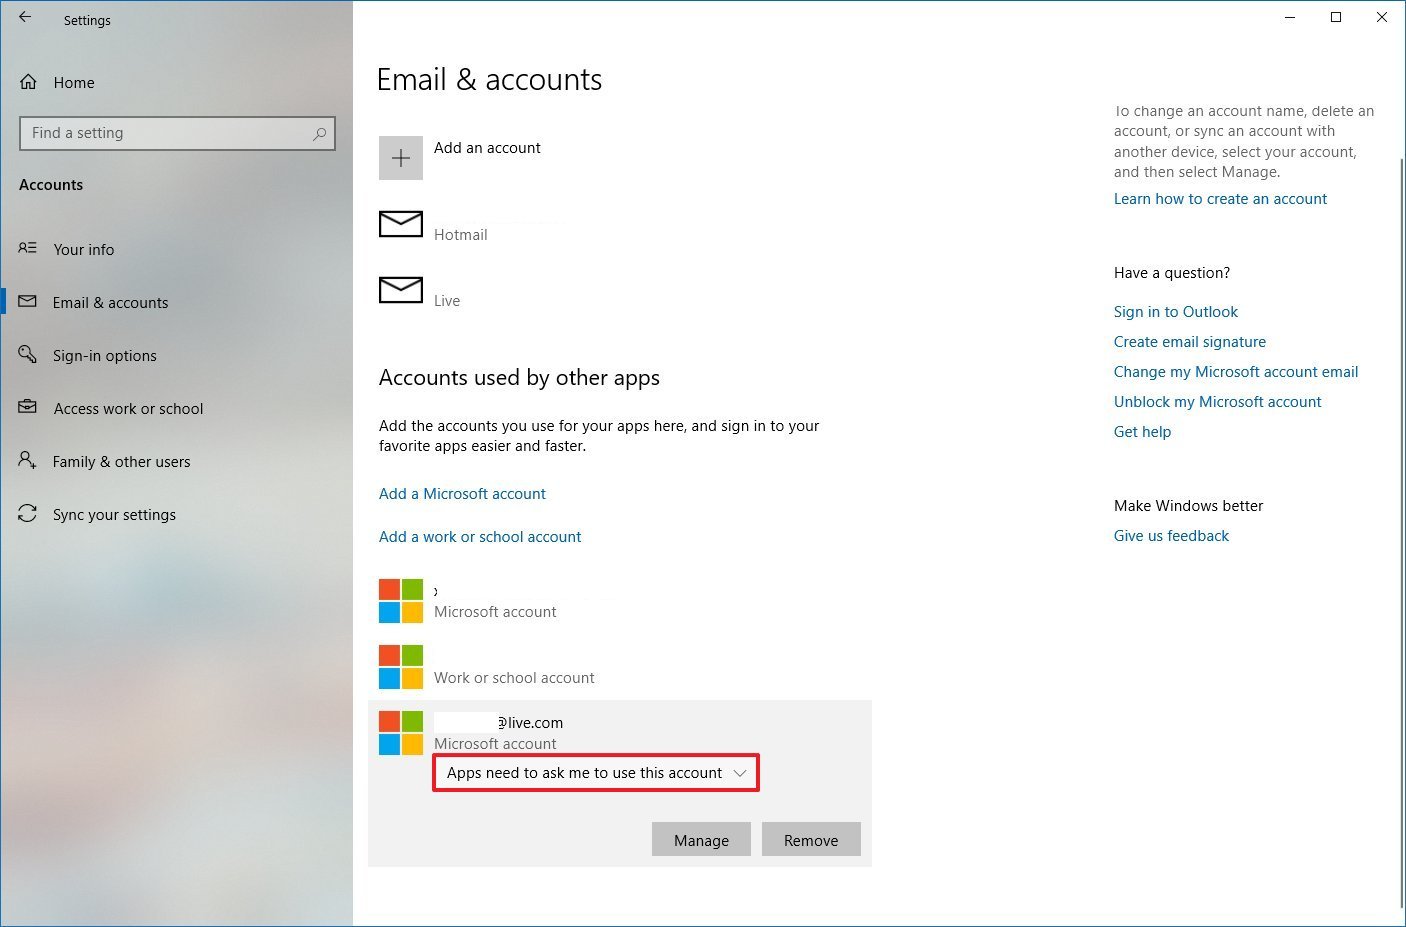

After completing the steps, apps will prompt to permit access before signing in to the service.
How to remove emails and accounts using Settings
If yous're no longer using an business relationship, you lot can remove it from the Windows 10 settings using these steps:
- Open Settings.
- Click on Accounts.
- Click on Email & accounts.
- Select the account that you're planning to remove.
-
Click the Manage button.

-
Click the Delete account from this device option.

- Click the Delete button.
- Click the Done button.


One time yous complete the steps, the business relationship data volition only be removed for the Mail, Calendar, and People experiences. If you want to remove a Microsoft business relationship information completely, yous too need to delete the information from the "Accounts used past other apps" section with the steps beneath.
Removing accounts for apps
If you need to remove an account for apps, utilise these steps:
- Open up Settings.
- Click on Accounts.
- Click on Email & accounts.
- Under the "Accounts used by other apps" section, select the account that you're planning to remove.
-
Click the Remove button.

- Click the Yes push.

Later completing the steps, the account information volition no longer be available on Windows 10.
More Windows 10 resources
For more helpful articles, coverage, and answers to common questions most Windows 10, visit the following resources:
- Windows x on Windows Central – All you need to know
- Windows 10 aid, tips, and tricks
- Windows x forums on Windows Central

Oh Love
New report reveals Microsoft'due south time to come AR strategy; HoloLens 3 is dead
Business Insider has today published a follow-up report with more details about Microsoft's canceled HoloLens iii augmented reality headset. The partnership with Samsung is said to include a headset with a set of screens inside, powered past a Samsung phone in your pocket.

Keeping it affordable
Review: Surface Laptop SE is the new standard for K-viii Windows PCs
Starting at only $250, Microsoft's kickoff foray into affordable laptops for the education market is a winner. With a gorgeous design, excellent thermals, and a fantastic typing experience, Microsoft would practise right to sell this directly to consumers besides. Allow'south just hope Intel can make a improve CPU.

Source: https://www.windowscentral.com/how-manage-emails-and-accounts-settings-windows-10
Posted by: vinsonpaun1939.blogspot.com
0 Response to "How to manage email and account settings on Windows 10"
Post a Comment